|
Symptoms of a Leaking / Damaged U-Joint Boot If you notice water leaking into the boat from
the back outdrive area, you will need to inspect the Mercruiser unit as soon as possible. With the Mercruiser Alpha one outdrive
drive off the boat, take a look inside the drive shaft tunnel in the bell housing, and feel around the inside of the rubber
tube. It should be dry and you should not feel any water or oil if you find oil inside, you will need to also inspect the
front seal on the upper gear case for an oil leak. If you have a leak in the rubber, depending on how long it has been leaking
-the water can cause the u joint assembly to rust and freeze into the gimbal bearing. It may also cause damage to the gimbal
bearing. Turn the inside of the bearing there should be no rough spots or sticking points.
Removing the Mercruiser Stern Drive from the Boat Before removing and installing the u joint, exhaust
bellows, you must first remove the stern drive from the boat. In order the remove the drive, you may or may not drain out
the gear lube first. Since you’ll be working on the transom assembly and not the internal components of the gear case,
this is not needed unless you’re scheduled for a regular lower unit oil change or re-sealing the drive. Always make
sure the drive is shifted into forward before beginning. You’ll need to remove the trim / tilt cylinders from the upper
gear housing by removing both of the 9/16” nuts securing them to the anchor pin. If the pin spins when trying to undo
the nuts, you’ll need to secure the pin with a pair of pliers to undo the nuts – one side at a time. Remove the
washers and rubber bushings from both sides, and gently pull each trim cylinder away from drive until they clear the pins.
Remove the anchor pin by sliding it out. Now you can begin removing the stern drive from the boat. There are six 5/8 inch
nuts securing the upper gear case to the bell housing which need to be removed, along with the washers. Gently pull the drive
back away from the bell housing until the upper unit is clear of the six bolts. It should come out fairly easily – if
you feel it is seized and won’t budge, it is most likely due to the drive shaft being seized into the engine coupler
or the gimbal bearing. If you need information on un-seizing the shaft from the coupler or bearing, please contact our technical
department for instructions. After removal, gently put it aside, making sure not to let it drop on the propeller shaft as
this may cause the prop shaft to bend. Make sure to remove the large mounting gasket – never re-use it, always make
sure to replace it with a new one. You can purchase one new mounting gasket here.
The Transom Assembly - Explained As shown in the picture, the outdrive is connected to the
bell housing. This housing is then secured to the gimbal housing via the gimbal ring. There are four roller bearings installed
in this section, two are responsible for side to side (steering) movements, and the other two are responsible for the up and
down (tilt) function. The gimbal ring is secured to the bell housing using two ‘hinge pins’, which can only be
removed and installed using a special tool. These pins will need to be removed in order to remove the housing (described below). Removing
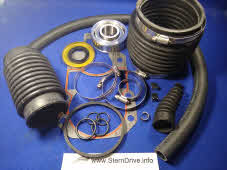
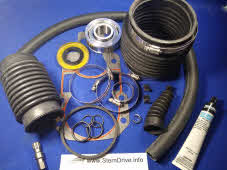
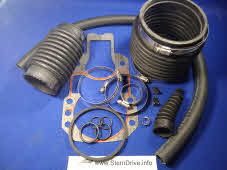
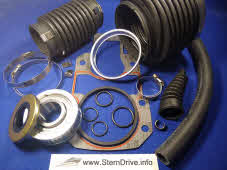
/ Installation This job may take several hours. Many people performing this repair choose to replace all parts
- including the gimbal bearing while they have everything disassembled (complete kit is available below). After the stern
drive has been removed, it is recommended to remove the bell housing to perform this job. Regardless of what the repair manual
says, not removing it will make this job extremely difficult and even more time consuming. First, you’ll need to disconnect
the shift cable from inside the boat. You notice the shift cable is secured to a plate which is mounted on the motor. Remove
the nut / washer, along with the cotter pin, followed by the set screws which will allow you to remove the plastic guides.
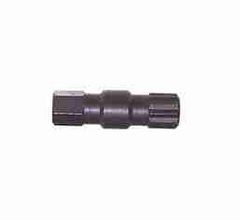
Next, go back to the stern of the boat and use the hinge pin tool (shown below) to unscrew the two pins. Depending on the
last time they were removed, it may take considerable force to loosen them. In some instances, you may need to heat them up
with a torch to get them off. Once removed, you’ll notice there are two large fiber washers in between the gimbal ring
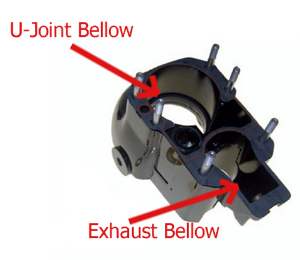
and housing (it is essential that you re-install these when putting the housing back on). Remove the exhaust bellows for Mercruiser
and the clamp on the water hose; slowly pull off the bell housing, taking note of the shift cable boot as you slide the cable
through. Make sure to take off the small clamp around the small end of the cable boot before attempting to slide the cable
through it. Once the housing has been removed, you’ll have access to the Mercruiser Alpha gimbal section. There
will more than likely be some type of corrosion or damage to the clamps, so be sure to always replace them with new stainless
steel ones. Adhesive or some type of glue would have been used during previous installation, an optional expander tool, ;
you’ll need to work on getting them off. Since they’re being replaced, you don’t need to worry about cutting
or tearing them during the removal process. Note – make sure to note the position of the clamps and bellows before removing
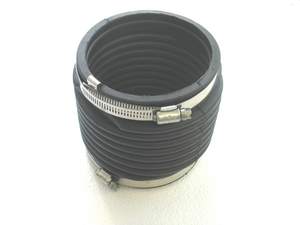
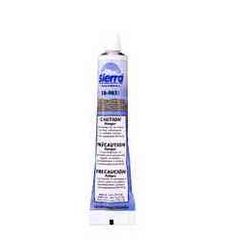
them, and install in the same position during re-installation. Before installing the new bellows parts, make sure to inspect
and clean the flanges on the gimbal and bell housing side. ALWAYS, use adhesive when installing the new part. Make sure to
install the bellows grounding clip on both sides of the tube before loosely sliding the hose clamps on both sides. These clips
ground the stainless steel clamps and prevent corrosion. Coat the inside lips of the bellow and the outside of the housing
flanges with bellows adhesive, and slide onto the flange (bell housing side first) followed by the hose clamp. Tighten the
clamp, re-install the exhaust bellows for Mercruiser Alpha one (an exhaust bellows expander tool is available to make this
easier)and clamp for the water hose and then re-install the bell housing - allowing the other side of the bellow to snap onto
the gimbal housing flange. You’ll need to guide it into place; this may take a couple attempts. Don’t forget to
reinstall the small clamp on the end of the shift cable bellows boot as well. Tips, Tools and Parts
There are several tools described in this article to that are required to properly perform this job. Taking short cuts
or not using the correct tools will more than likely cause you to have to re-do the job or get stuck and not be able to move
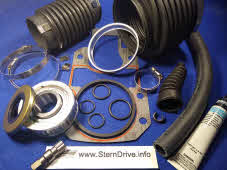
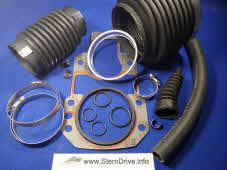
forward to the next steps. For 1974-1990 models, use kit 21950, for Gen ii models use kit 21960 which replaces Mercury 30-803099T1.
|