|
- Gear-head rebuild help for 8 or 10 bolt swivel housings
- Prop shaft bearing retainer (gear-head) years
1967-1971
- Swivel housing does not need to be separated from gearcase for this repair
- Two oil seals and bearing
will be removed
- Three oil seal and one bearing will be installed
- Electric shift step by step pictures of outdrive
rebuild
- How to series for Electric shift outdrive forward or reverse coil repairs.
- Clutch spring and swivel housing rebuilt
|
|
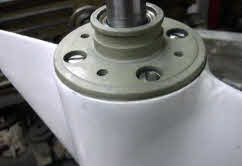
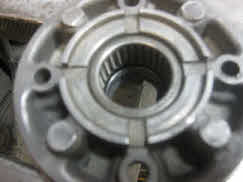
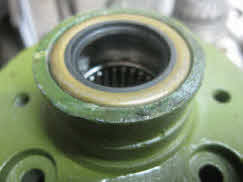
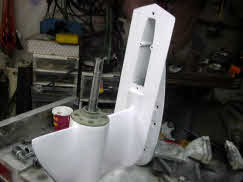
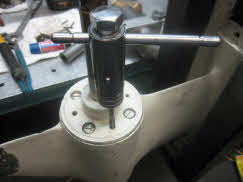
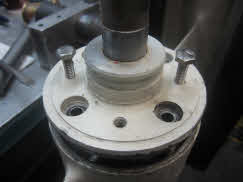
OMC outdrive showing sand blasted gear-head area
|
Sandblast or wire brush lower unit outdrive area, so not particles fall into stern-drive when we pull gear-head assembly out.
|
|
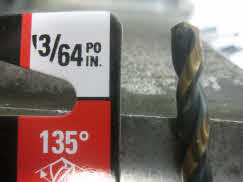
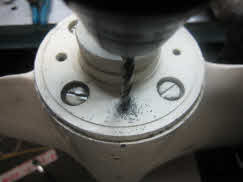
| A Clean out screw hole with 13/64 drill |
|
Clean out screw hole with 13/64 drill.
|
|
| B Drill out 5/8 inch deep |
|
Drill out 5/8 inch deep.
|
|
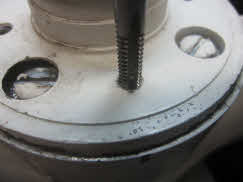
| C Tap size is 1/4 inch 20 n.c |
|
Tap size is 1/4 inch 20 national coarse thread.
|
|
| D Re-tap about 1/2 inch deep |
|
Re-tap about 1/2 inch deep.
|
|
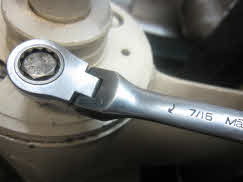
| E 7/16 wrench required |
|
7/16 wrench required.
|
|
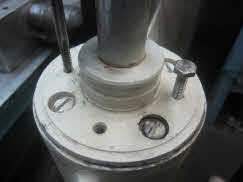
| F Only 2 bolt holes required |
|
Only 2 bolt holes required.
|
|
| G |
|
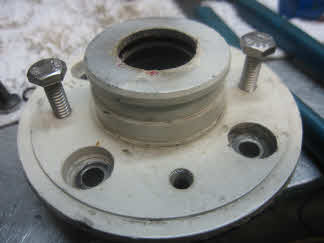
Remove the 4 screws from gear head assembly.
|
|
| H |
|
Remove old o rings.
|
|
| I Install new o rings from seal kit P/N 87620 |
|
Install new o rings P/N 87620.
|
|
| J Remove gear-head with bearing carrier puller |
|
Remove gear-head with bearing carrier puller.
|
|
| K Can allso just pry out just holding screw |
|
Can allso just pry out just holding screw.
|
|
| L Remove by hand after 3/8 of an inch |
|
Remove by hand after 3/8 of an inch.
|
|
| M |
|
Can now remove screws.
|
|
|
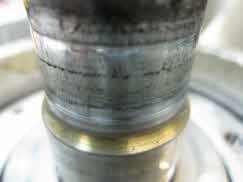
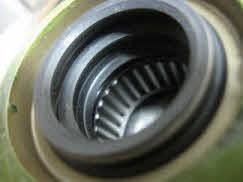
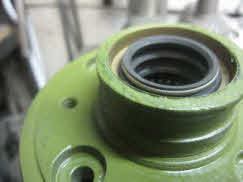
Notice groove on water area of drive shaft and groove on oil seal area of the lower part of drive shaft
|
| |
Notice groove on oil seal area the lower part of drive shaft .
|
|
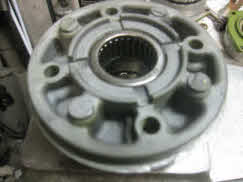
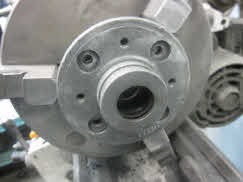
| Wire brush bearing retainer |
|
Remove o-ring and clean old gasket compound from unit with fine wire brush
|
|
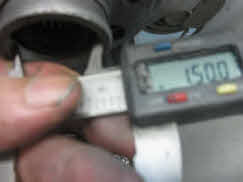
Machine new oil seal area to 1.500 inches
|
Lathe will be required to machine front face to hold extra oil seal. Machine new oil seal area to 1-1/2
inch, you can be over by up to .007 if using 680 and .003 with 609 green Loctite retaining compound. Note Loctite products
are listed under tools if you need to purchase this item.
|
|
|
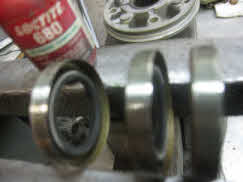
Remove old seals and bearings by pushing on bearing. Then sandblast or wire brush old gasket compound off gear-head assembly.
Note Johnson gasket retaining compound is listed under tool if required.
|
|
Clean bearing and seals of any 680 loctite
|
|
|
Machine new oil seal area to 1.500 inches
|
By author Trish Dougherty
Lathe will be required to machine front face to hold extra oil seal. Machine new oil seal area
to 1-1/2 inch, you can be over by up to .007 if using 680 and .003 with 609 green Loctite retaining compound. Note Loctite
products are listed under tools if you need to purchase this item.
|
|
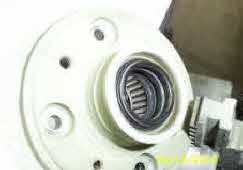
Remove old bearing and seals
|
Remove old seals and bearings by pushing on bearing. Then sandblast or wire brush old gasket
compound off gear-head assembly. Note Johnson gasket retaining compound is listed under tool if required.
|
|
Push bearing all the way thru to remove parts
|
Push bearing all the way to to remove oil seals and bearing parts
|
|
Push bearing all the way thru to remove parts
|
Press only half way if you are not replacing with new bearing.
|
|
Coat 3 oil seals with 680 loctite
|
Loctite must be applied to outside on three seals.
|
|
Cover inside bearing and seal area with 680 loctite
|
680 Loctite must be applied to
inside of retainer
|
|
Install new bearing with the number up
|
Now you can install bearing 1st and seals after.
|
|
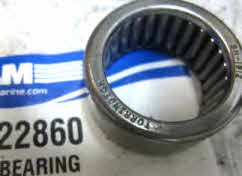
Will require one 22860 bearing OEM 379504
|
Will require one P/N 22860 bearing OEM 379504
|
|
Install first seal spring area down
|
Cover bearing, seals and o-ring area before painting with zinc chromate primer. Place 2 or 3 coats of clear lacquer over that
to stop corrosion.
|
|
Install till flat
|
Install till flat
|
|
Install second oil seal with spring area up
|
Install second oil seal with spring area up
|
|
Two seals installed here
|
Two seals installed here
|
|
Line up and install third oil seal
|
Line up and install third oil seal and wipe off excess 680 Loctite compound
|
|
Insert oil seal till flat on top
|
Insert 3rd oil seal till flat on top.
|
| |
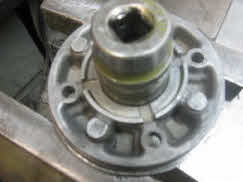
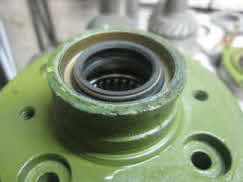
Clean bearing and seals of any 680 Loctite. This is a used electric shift with rebuilt gear-head
|
|
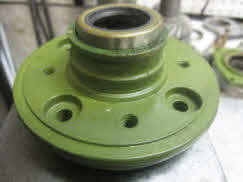
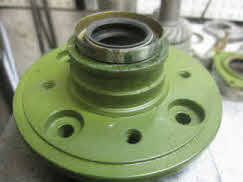
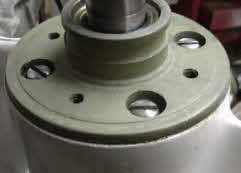
Used electric shift with rebuilt gear head
|
Used electric shift with rebuilt gear head
|
|
Used electric shift with rebuilt gear head
|
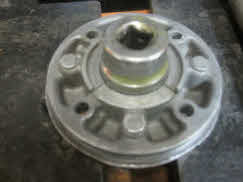
P/N U-22-540 Used gear head assembly OEM 381849 with 3 seals in propeller shaft
area. Bearing retainer has three seals located in different areas. This is so any groves that may be on the old prop shaft
will not come in contact with the newly placed seals. Gear head assembly has zinc chromate primer with clear coat paint.
$179.09
|
|
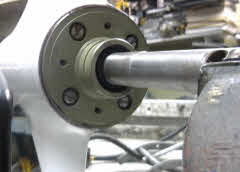
Shaft view electric shift 1971-1977
|
OMC sterndrive shaft view for electric shift years 1971-1977
|
|
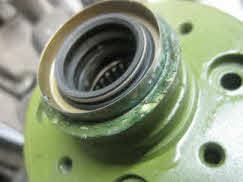
Used electric shift with rebuilt gear head
|
This is a standard rebuilt used electric shift sterndrive from T.C.Electronics/Marine
|