OMC electric shift sterndrive repair *OMC parts drawing *Video

T.C. Electronics/Marine (416) 751-7326 Home Page

OMC ball gear removal *shimming tips *video

400-800 Series ball gear installation-shimming with video instruction by T.C. Electronics/Marine tech service representative Wayne Coll

  • The following steps are that of the author Wayne Coll and is in no way connected to or endorsed by OMC or Seloc manuals.
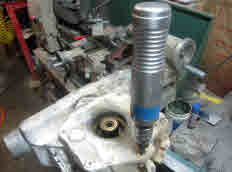
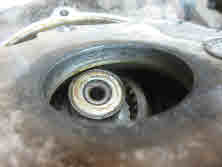
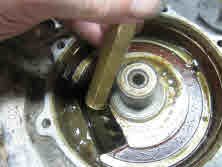
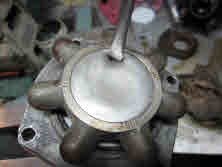
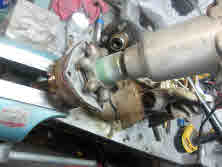
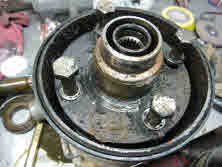
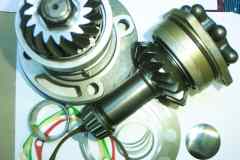
  • Repair help listed is based on the last 500 units or OMC 400-800 Stringer upper gear case repairs we have made.
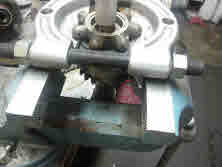
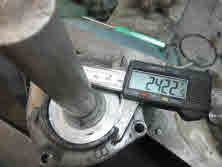
  • Instruction are going to be limited to what I think the average person doing this type of repair may have at home or work in the way of tools.
  • Tools we use would hit the 10,000 dollar mark or more if you include lathe, mig welder and milling machine to bore housing for the small rear bearing insert.
  • Exploded View Drawings

By author Trish Dougherty

Disconnect battery cables from battery and disconnect shift cable. then apply wheel bearing grease on shift cable or if electric shift the shift wire.

Remove 1/4 moon gear that is held on with three 3/8 bolts.

Back off 1/4 inch bolts on side retainer plates on both sides by 2 full turns (do not remove). One bolt holding ground wire will need to be removed.

Lift and support out-drive and remove shift cable retainer clip located under intermediate ball gear held with one 5/16 bolt

Pry off rubber bumper and label split bearings left, right and top side, then remove slit bearing bolts.

Remove top oil fill screw and take top off exhaust housing cap (preys up with screw driver), note years 1978-1985 is held on by four 5/16 bolts. 1969-1977 is held on by five 1/4 inch bolts.

upper gearcase top and screw removal

Remove or replace Philip screws and top cover with auto impact tool works best.

Top lid with pitting in o ring area

Note replace top if cover has groves in o ring area

(2nd biggest cause of OMC upper gearcase leaks)

Pushing out gear with punch

Remove four ball gear retainer bolts and push driven gear assembly out of upper gear-case with brass punch.

Remove plug

Remove plug

Remove ball gear plug by piercing hole with punch and then pry out with screwdriver.
Undue nut with 1-1/8 inch socket then, then remove seals with punch.

nut

nut

Once bearing race is removed or just cleaned the bearing retainer need to be sand-blasted or wire brushed. The seal area off the back to back seal is the important key factor at this time. Failure to clean retainer seal area well, can result in leak on the outside area of the seals.

old
old

oil seals

oil seals

Note ! if seal area becomes larger than the seals do not order a new one. We will be using a compound called Loctite 680 that will allow for a gap up to .020 between seal and retainer. This compound will hold seal in place with out any problem to a strength of 600 lbs per square inch of seal with .010 gap.
The best part is it fills in any voids made by corrosion how ever they must be wire brush clean is the only requirement. I have used this 680 and 609 compound 10 to 50 times a week and never had a seal leak. I started using this compound about 10 years ago. That said we will not be installing seals till after we shim the ball gear drive shaft assembly

pinion gear
pinion gear

Remove seals with punch and hammer

Remove water pump bolts

Remove water pump bolts with 3/4 inch socket

outside race
outside race

Bearing removal if required will be done with seal removal tool. Size need to be just under 1-1/2 inches say about 1.485 inches will works fine. Bearing normally comes out easy can push out on vise with the seal removal tool that you will have to obtain or make one.

22590 gears bearing retainer assemble

22590 gears bearing retainer assemble

Shims for the ball gear assembly in upper gearcase

23310 shim kit 400-800 series

23310 shim kit 400-800 series